Knife Reviews & Articles
Sharpening
A Magic Art?
What's so magical about sharpening a knife? We hear all sorts of comments such as "D2 is a great steel, but its really hard to sharpen". Is it? Is it Really?
Folks, there is no magic art to sharpening a knife, and it certainly needn't take hours. What's more, although some sharpening aids can help (sometimes), there just isn't any real substitute for good old fashioned stones.
 |
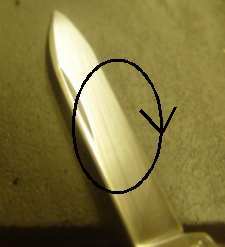
Most knives come out of the box with a business edge that is much too
"short". The black line in the diagram. This sort of edge is good for chopping
and coarse work. Sure, the business edge (the point in the diagram) is "sharp",
but it isn't going to slice well. It isn't going to slice well because of
the "angle" between the edge and the main part of the blade. It gets in the
way!
A shallower angle (the red line) will slice well, and it will "push cut" well too. The out-of-the-box angle will stay "sharp" a little longer than a shallow angle, which will need touching up more often. Do an experiment. Take one of your out of the box knives and cut a V notch into the cross grain of a piece of hard wood. Then after you have made a shallow angle edge, do the same, and see which is easier to cut with. The difference is amazing. If you are a whittler, then you'll notice the difference even more.
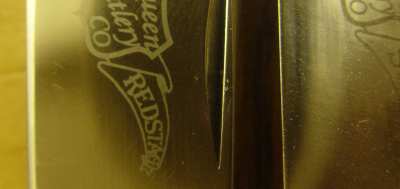
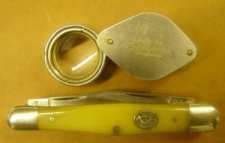
Two knives. On the left, resharpened to a shallow angle, and right, (actually a knife of the same pattern and from the same maker) straight out of the box. You can see the difference really easily! That's what we are aiming for when we sharpen your knife. We're going to get ourselves three stones:
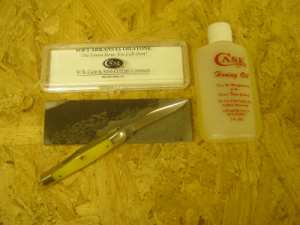
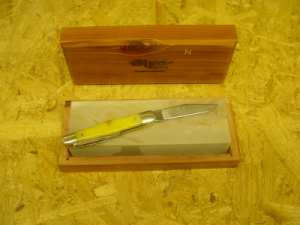
Don't fiddle about with small stones. They're a poor investment. A stone which is about 1-3/4" to 2" wide is the minimum. And preferably about 6" long. Your three stones are going to last you a lifetime!
|
||||||
|
Stage 1We are going to get that angle down, and reprofile the edge of the blade. What angle? Hey folks! Despite what you read, it just isn't that critical! 20 degrees? 18 degrees? 25 degrees? - Heck! without complex jigs its just isn't possible! What we are aiming for is a much shallower angle than "out of the box". I'm not even going to tell you an angle. But important: keep it evenly the same both sides. Use honing oil. Don't do it dry. Place the knife not quite flat on the coarse carborundum stone. Think of it like this.... an angle just steep enough that you are not going to put scratches on the nice flat shiny blade. With some oil on the stone, start working it around in circles, pressing down quite hard. Go right up to the tang. The tang will stop you from going up to the bolster of the knife. You'll read about doing straight "cuts" along the length of the stone. Hey, that can come later with the other stones. In this stage we want to remove metal. Plenty of it. A circular motion works well, and furthermore, it is easier for you to keep a consistent "angle". The only thing that you are not going to do, is slide off the end of the stone. That will scratch the flat surface of your blade. Do a couple of dozen circles on one side, then flip it over and a couple of dozen circles on the other side. Keep the knife at the same angle. Now, with a good X10 magnifying glass, look at the edge that you have created. If you can still see a "double angle", then you haven't cut enough metal away, so stone it some more both sides. The whole process, even with a D2 steel blade, should only take a few minutes. Other steels less. Aim for an equal amount of shiny edge on each side of the blade.
|
||||||
 |
Stage 2Now we are going to start to smooth off the metal. But at the same angle. A soft Arkansas stone is quite coarse. It will still remove metal quite quickly. But the object of the exercise here is to smooth down the coarse "grind marks" of the carborundum stone. By the way, don't worry if your stone varies in colour. (Like this one). It doesn't matter. It is the same grade all over. Use honing oil. Don't do it dry. This time, we are going to do "slicing cuts" on the stone. Just imagine that you are trying to cut the stone, and work in that one direction only. Keep the blade at that same shallow angle as before, otherwise you'll end up with a "double angle" again. Do an equal number of cuts each side. Wipe the blade with a clean cloth, and then inspect it with the X10 magnifying glass again, holding it against the light so that you can see the edge as a shiny line. Make the edge the same each side. Note that in this photo, the red arrow points to the dark swarf in the oil, made by smoothing the edge. Its metal that you can see. (That's good!) For curved points (as on this blade) make the "cut" turn a little as you come to the point. Aim at having a nice equal width new edge the whole length of your blade. The only thing that you are not going to do, is slide the blade off the end of the stone. That will scratch the flat surface of your blade. (Did I say that already?) Get that edge nice and even along the length of the blade, and the same both sides. Feel with your thumb or finger for a burr on one side of the blade. Wipe that burr off on the stone. (A finger will feel what your eye can't see). Even at this stage, your knife will now cut really well! But we can make it even better. But before you move on, clean your stone. Wash it in warm soapy water with a nail brush. That removes traces of steel, and will make your stone perform well again next time you use it. |
||||||
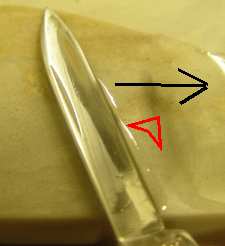 |
Stage 3Again we are going to do slicing cuts with the blade on the stone. Again at that same angle. And equal both sides. The translucent Arkansas stone will polish that edge that you have created. Use honing oil. Don't do it dry. Note again in the photo - it still removes metal, as seen where the red arrow points. The only thing that you are not going to do, is slide the blade off the end of the stone. That will scratch the flat surface of your blade. (There, I said it again). You can spend several minutes on this fine polishing stage. Keep inspecting the new edge with that magnifying glass, to make sure that it is flat and even. It really starts to show up now if it isn't. (By the way, an X10 glass will still show that the surface really isn't a high polish at all - it just looks that way to the naked eye). |
||||||
| Will the knife now shave hair off your arm? It might, or it might not.
But it will do push cuts into cross grain of hard wood. Try that V notch
test again and see what I mean. It will also do superb slice cuts too. Did
you really want to shave hair off your arm? If you do, then buy a razor
|
|||||||
Maintaining that edgeKnives go blunt with use. It all depends what you are using them for, and how often. But you can forget stage 1, and probably stage 2 in future. Just polish the edge up on the translucent Arkansas stone.
So there you go. There's no magic, and really not even a lot of skill. But that new edge looks great, and it really does the business. |

May 2005
Copyright ©2005 Rod
Neep All Rights Reserved
Photographs by Rod Neep